How To Make a Terrarium
 Adams Fairacre Farms
 If you’re interested in testing out your green thumb, but don’t have the space to do so, a DIY terrarium is just what you need. These mini tabletop gardens are fun to create and are a great way to perk up your indoor space.
In addition to being enjoyable and decorative, terrariums are also easy to care for and simply beautiful. It’s a DIY win-win.
What is a Terrarium?
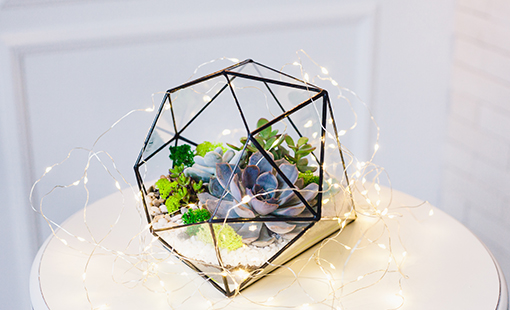
A terrarium is a collection of small, decorative plants growing in an enclosed environment. Terrarium containers are typically transparent and provide an opening big enough to allow the gardener to access the plants inside. The best part about a DIY terrarium is that you get to create something one-of-a-kind.
We’ve got you covered with everything you need to know about how to make a terrarium. From definition and inspiration to creation and care, you’ll be enjoying your miniature garden in no time at all. Before you roll up your sleeves, let’s make sure you have all the supplies you’ll need to get started.
DIY Terrarium Supplies
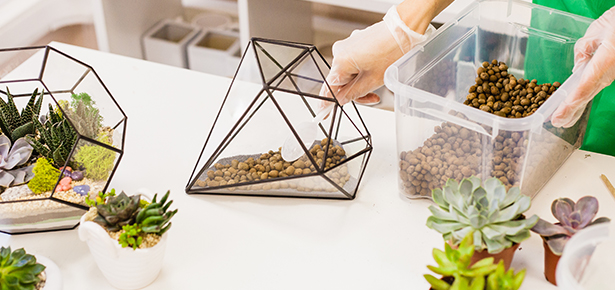
- Glass Vessel – You’ll need some sort of glass vessel to create your terrarium. There are plenty of unique containers from which to choose. Just make sure that the vessel is made of a transparent material so you can enjoy your mini-garden.
- Small Stones or Pebbles – Small stones or pebbles will be used as the base of your terrarium. The small pebbles act as water drainage for the plants’ roots to ensure that excess water doesn’t stay in the soil and cause rot.
- Activated Charcoal – You won’t need much; a thin layer of activated charcoal keeps water fresh and helps to fight off bacterial growth in your terrarium.
- Potting Soil – Potting soil will act as an important layer for your DIY terrarium. Any type of soil should do the trick, although there are special mixes available if you’re planting cacti or succulents.
- Plants – It wouldn’t be a terrarium without the greenery. Pick out a few of your favorite pint-sized plants to use in your terrarium. Air plants, succulents and mini-cacti are all viable options.
- Small Gardening Tools – Having small tools handy will help you create and situate all of the items in your DIY terrarium.
Best Plants for Your DIY Terrarium
When selecting plants to use for your DIY terrarium, there are a few things you should keep in mind:
- Select plants that are small enough for your glass vessel. You won’t want any greenery touching the sides of your container and making your terrarium feel cramped.
- Plants that do well with humidity are most likely to thrive in your terrarium. Although succulents and cacti aren’t humidity’s biggest fans, you can compensate by using a glass container with a slight opening, like the one we used for this tutorial.
Whatever plants you select, you can keep them healthy by mimicking their natural environment in your terrarium. We recommend choosing a few from the list below:
- Air plant
- Moon Valley
- Starfish plant
- Nerve plant
- Assorted succulents
- Assorted cacti
Once you’ve picked out the perfect plants, it’s time to get started. Follow the step-by-step guidelines below and you’ll be on your way to creating your own decorative garden in no time at all.
Step 1: Cover the bottom of your terrarium with a 1 ½ inch layer of small stones or pebbles.
The bottom layer of small pebbles will act as drainage for your terrarium.
Step 2: Add a very thin layer of activated charcoal.
The activated charcoal will keep water fresh and fight off any bacterial growth in your terrarium.
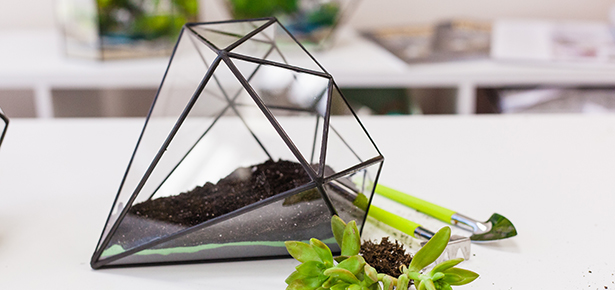
Step 3: Add a layer of potting soil.
As we mentioned, any potting soil mix will do, although if you’re planting succulents or cacti there are specialized mixes you can use. You’ll want to add enough potting soil so that it’s deep enough for your plants to root into it. We recommend a layer that’s about 2 ½ inches.
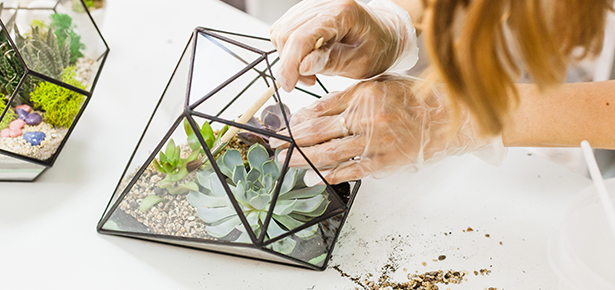
Step 4: Time to add your plants.
- Start by planting your largest plant first. Remove the plant from its container and prune the roots as you would when repotting any plant.
- Then, make a hole in the soil large enough to fit the plants’ roots.
- Next, nestle the plant into the soil. It’s easiest to work your way from the back to the front of your terrarium. There’s no rhyme or reason to the design of your terrarium, play around with the arrangement and don’t forget to have fun!
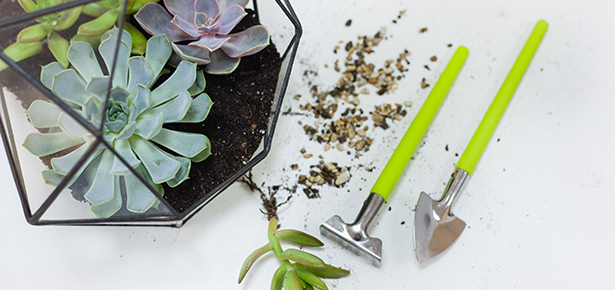
Pro Tip: Use gloves when handling cactus or any other prickly plant.
Step 5: Complete the look with a layer of pebbles.
You can also opt to add some personality to your terrarium with miniature gnomes or trinkets.
Once your terrarium is complete, you’ll need to take proper care of it. Sunlight and water are two essential items for the success of your terrarium.
- Be sure to lightly water the base every two weeks or once the soil looks like it has dried out.
- You should also display your terrarium in an area that receives a lot of bright, indirect sunlight.
Terrariums look great displayed among a variety of houseplants or on their own.
Information courtesy of ProFlowers.com